
Bare Minerals UK Review: Bare Minerals Make Under Experience and Recreating The Natural Flawless Bare Skin Look At Home
Since transitioning to using products made with natural ingredients (or as natural and as ethical as it can be) I find myself being very open-minded which results in constantly being on the lookout to try out hair-care, beauty and cosmetic products with the view of adding a few discoveries to my exsisting beauty regime. On the rare occasion I choose to wear make-up, I naturally opt for liquid foundation, but over the months I have become extremely curious about mineral make-up and through research led me to Bare Minerals, the very company that started the mineral make-up revolution.
Whilst there are a fair few mineral make-up brands out there, I found myself naturally gravitating towards Bare Minerals not only for their wealth of knowledge and reputable expertise in the mineral make-up field, but also because they have a wide range of shades to choose from.
As pointed out in a previous vegan foundation article I wrote a few weeks ago, this is particularly important to me being a woman of colour for most instances, I find cosmetic brands in particular natural and organic brands only ever have a few shades available for women of colour to choose from and as you’re already aware, we come in an array of different skin-tones, shades and complexions!
Through my own initial enquiry about Bare Minerals, their products and philosophy via Twitter, I was put in touch with a lovely in house public relations lady who after speaking to her further advised me to book in for a ‘make-under’ at one of their boutiques in London.
This idea was great for a mineral make-up newbie like me as not only was I getting the opportunity to be further educated on each of the products used during my make-under and ask any pressing questions I had, I would also be equip with the knowledge and most importantly the know how to apply these never before used cosmetics to myself unattended at home.
Bare Minerals Make-Under
Despite living in London, it is rare to find me anywhere near Central London as I genuinely despise the sheer busyness of it all but decided to book in for my make-under experience at the Bare Minerals London flagship boutique in Covent Garden a few Monday’s ago as I had a few meetings pre-arranged in town that afternoon.
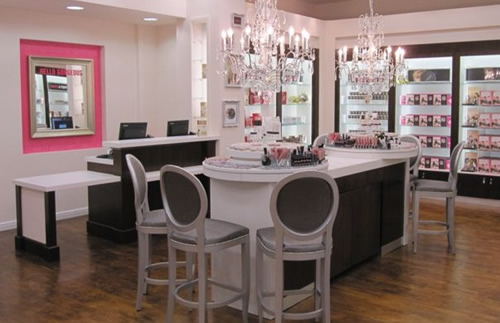
It was a lovely sunny day but in true British style it started to drizzle upon walking up to the boutique from Leicester Square Station and couldn’t help but be fearful of the rain spoiling my new look should it still be raining upon leaving my appointment! Nonetheless I arrived at the store on time ready for my make-under.
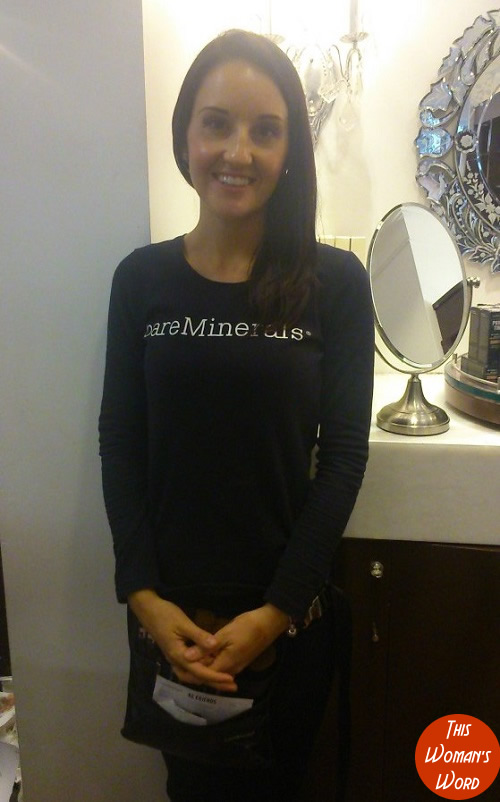
I was greeted by three friendly and polite ladies and after confirming my pre booked appointment with one of them, I was handed over to my assigned make-up artist for the duration of my visit. Lauren began by asking me a few generic questions about my skin type and current regime so see could gauge what products to use for the first stage of my make-under to cleanse and prep my skin prior to application of make-up.
Cleanse and Prep Stage
Questions answered, Lauren cleansed my entire face using two cotton pads, starting at my forehead area, around my cheeks, down to my chin and neck area finishing off around my upper lip and nose. She then began applying a few drops of Bare Minerals Active Renewal Night Serum to my hands and was asked to gently rub the serum into my freshly cleansed face.
A few pumps of Bare Minerals Purely Nourishing Moisturiser was then applied to my face, again using two small cotton pads lastly followed by few drops of Prime Time Oil Control Primer
As I have classic combination skin, Lauren advised these products would work best with my skin type. Face feeling extra fresh and hydrated after my cleanse and prep, Lauren then began to talk me through the three different mineral foundation ranges:
- Original SPF 15
- MATTE SPF 15
- Bare Minerals Ready SPF 20
Bare Minerals Foundation
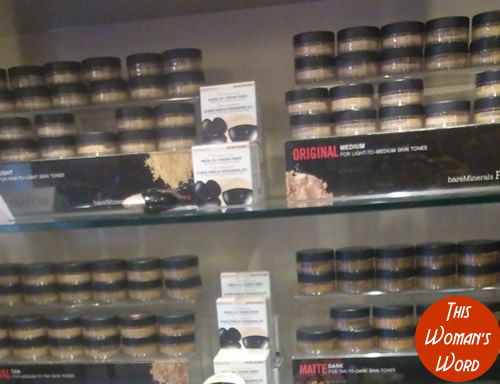
I learnt that the Original SPF 15 is designed to give the user flawless sheer to full coverage whilst giving a natural luminous bare skin finish that won’t clump or cake and was advised this foundation would last up to 8 hours whilst the MATTE SPF 15 is designed to absorb excess oil and climate shine for a natural matte finish which also lasted up to 8 hours.

The Bare Minerals Ready SPF 20 was the longer lasting mineral make-up of the three available, lasting up to 12 hours and is the only one designed with solid mineral technology. Having weighed up each of the options (a tough decision to make) I ultimately opted for the Original SPF 15, as I was after a natural look and instantly warmed to the idea of wearing make-up that eluded a ‘bare skin’ look as this is the look I normally sport on a daily basis due to not being an everyday make-up wearer.
A quick colour match determined the Original SPF 15 in Golden Tan foundation and SPF 20 Concealer in shade Honey Bisque was true to tone and was accompanied by two further pots Warmth All-Over Face Colour and Mineral Veil in original finish. I recall being somewhat confused at using all four pots just for my face, surely this will take up alot of time to apply and finish this section of the look I began contemplating.
How To Guide – Swirl Tap and Buff For Flawless Foundation Application
Lauren began by demonstrating the Swirl, Tap and Buff technique in order to flawlessly apply the mineral foundation. A minuscule amount of Original SPF 15 foundation was tapped into the lid and using the Full Flawless Application Face Brush , she swirled the brush around until the minerals were nicely tucked into the bristles.
She then tapped the brush on the lid to remove the excess minerals. To do this successfully, I was advised the minerals should not be visible on the outside of the brush. The final stage in applying the foundation was to ‘buff’. The idea was to apply the minerals onto the skin using a swirling, circular motion, starting on the outside of your face near ones cheekbones and then buff around the face working your way to the cheeks, forehead and nose area.
Lauren did half of my face and was coaxed into completing the other half of my face using the techniques previously demonstrated. I’m not gonna lie, this whole ‘buffing’ in a circular, no 3 and the letter b pattern felt pretty alien and awkward to begin with but with anything the more you do it the better and more natural you’ll become so this eventually passed.
For those who are like me and are more of a visuals person, below is a short video demonstrating how to Swirl, Tap and Buff.
If you got the jest of the technique through my written instruction you can opt to skip watching the short demonstration.
Foundation and concealer applied, Lauren stopped to talk me through the rest of the make-up options to complete my sought after natural bare skinned look. We first talked eyes, I wanted to keep it neutral so Lauren suggested using the READY 2.0 Eye shadow in Mixologist and Cognac as these neutral shades would complement my skin-tone together with the Lasting Line Long Wearing Eyeliner in Eternal Bronze finishing the eye look with the Flawless Definition Waterproof Mascara.
To tell you the truth, I have never really bothered with a brow pencil before but Lauren advised on applying the Frame and Define Brow Styler to enhance the look of my eyebrows. As I choose to shape my brows by way of threading, sometimes a little too much brow hair is removed by the beautician which causes slight gaps in my eyebrow shape.
It was suggested the brow styler will come in handy at filling / lightly colouring in those small gaps which I must add also has a brow brush at the end of the pencil, how cool is that?
With foundation, concealer, eye and brow make-up applied, Lauren went back to the four mineral tubs she hand-picked for me at the start of my make under and began to buff the All Over Warmth on my face. This particular set of minerals can be used on any skin type and tone and gives a natural skin-kissed hue to ones face. She finished off the face with the original mineral veil which is the last set of minerals to apply. It is said to minimise any lines, absorbs excess oils whilst softening ones completion to give an airbrushed complexion.
Last but no means least it was time to choose some shades to give my lips a bit of colour. As you may already know from previous green beauty post I absolutely LOVE coral, bright and soft pink shades but was torn between opting for lipstick or lip gloss!

We first tried on Marvellous Moxie Lip Gloss in Party Starter which is a fiery coral looking colour and surprisingly tried on the Stunner shade, which is a deepish magenta colour, something I don’t normally opt for but caught my eye when browsing through the different shades of lip gloss available.
Keen to also try on a few shades of lipstick I gravitated towards the Marvellous Moxie Lip Stick in shade Live It Up which is described as a bright melon colour but would liken it a coral type shade and the ever stunningly Never Say Never Shade, which is a GORGEOUS soft fuchsia colour (this was literally love at first sight).
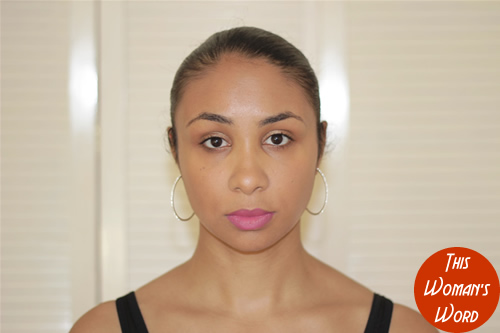
I did attempt at taking before and after pictures so you can see the transformation but due to the lights being incredibly bright in the Bare Minerals Covent Garden Boutique, none of the pictures taken really did the make-under or before pictures justice, so with that in mind, see below is the best shot of my make-under (please excuse the unruly bits of frizzy baby hair sticking up from my bun!)
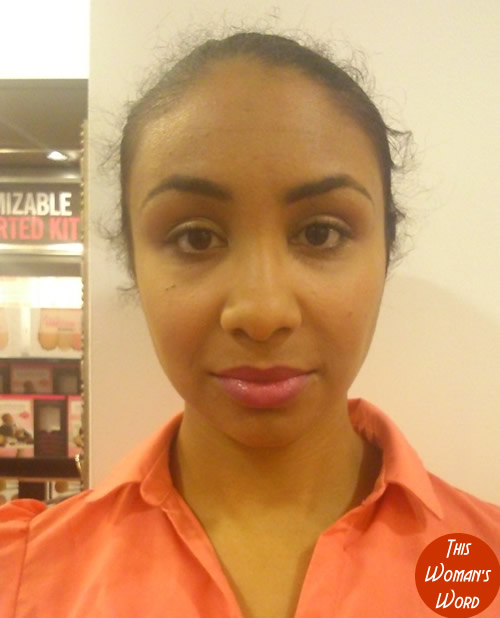
Even with the extremely bright in-store lighting, you can see from my post Bare Minerals make under pictures just how natural the mineral foundation looks against my skin and was pleased to witness first-hand the ‘bare skin’ finish the Original SPF 15 Foundation gives the wearer.
A note was made of everything my make-up artist Lauren used on me for future reference and went home that evening beyond excited about this new discovery of mineral makeup. When I got home, my other half didn’t pick on the fact that I was wearing make-up and his reaction was priceless when he learned I had makeup on my face. He commented on the naturalness of it and in his opinion, is my best foundation and concealer I have used to date! (a pretty bold statement).
Before I continue, I just want to take this opportunity to say thank the lovely Lauren for looking after me during my visit to the awesome Bare Minerals Boutique in Covent Garden, you were very thorough in explaining each product whilst helping me get the technique down when buffing on the foundation and generally was a pleasure to be in the company of during my visit to the boutique.
I caught up with the lady who originally booked my appointment the following day to share my thoughts and positive experiences of the Bare Minerals Make-Under and she advised me some samples were on their way for me to recreate the look at home.
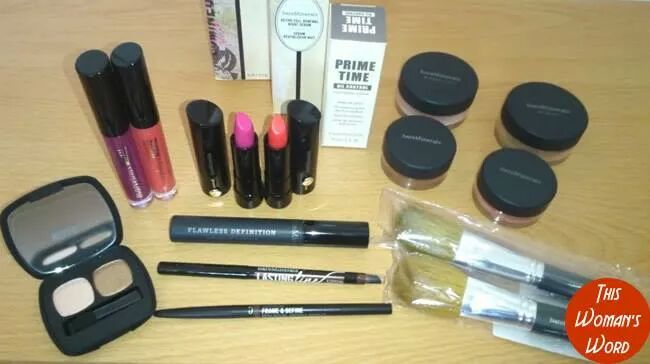
What I wasn’t expecting however is a HUGE Bare Minerals Jiffy bag containing almost every product that was used on me that Monday, including the brushes and skincare products and for that I am hugely grateful and thankful for!
Recreating the Bare Skin Flawless Finish Look At Home
So, with ALL THIS and no MAU at hand to advise me in the instance I had forgotten what I taught, I was worryingly left to my own devices. Eager to get stuck in and play around with my new cosmetics sent very generously by the Bare Minerals team (thank you again, you know who you are!) I took to the bathroom with the cosmetics in tow determined to recreate that same natural look straight after this picture was taken.
After prepping my skin with the night serum, moisturiser and waiting for the primer to dry, I thoroughly inspected each item, packaging and scrutinised the ingredients listed on the back of packaging.
I didn’t notice during my make under, or maybe I wasn’t pretty attention but was really impressed with the Click, Lock and Go sifter on the bare minerals containers. This cleaver design ensures that after use, the precious minerals do not spill everywhere when closed ready to be back opened again.
Primer now dry, I poured the minerals out into the lid which was no more than the size of a 20 pence piece. I remembered the Swirl, Tap and Buff technique (probably tapped the brush a little too often at times) and began to buff the Original SPF 15 Golden Tan into my skin.
It is worth mentioning the Flawless Complexion Brushes are made of Goats Hair, something I found out later whilst browsing their site so anyone with allergies to animal hair these brushes are probably not for you. Not completely satisfied with just one layer, I decided to pour out a second helping of minerals again the size of a 20 pence piece.
As this type of mineral make-up is incredibly light and weightless, you can hardly tell your face is being covered with it as it wasn’t the same feeling or coverage I was used to normally seeing when applying liquid foundation. Still unsure whether I had buffed enough on or not, I decided to move on and apply my eye make-up.
I started with the eye shadow first as this is the trickiest part for me due to my somewhat unsteady hand. I mixed the light shade of mixologist together with the cognac and began applying with the small little brush included within the nicely presently pallet.
Pleased I managed to apply both eyes without smudging it everywhere (this is what usually happens) I applied my long lasting eye-liner pencil along my watermark before applying a few coats of the Bare Minerals Waterproof Mascara. I found I needed to go over my watermark at least four times for the brown colour to show but go there in the end.
A quick fill of colour using the brow styler to the left eyebrow just after the arch ends and I was ready to apply the Warmth All Over Face and Mineral Veil before pondering on what lip colour to go for to complete my look. Lipstick or gloss, decisions decisions!

In the end I chose to complete my look with the Never Say Never Lipstick which I absolutely LOVE at the moment. The lipstick is incredibly moisturising, contains ingredients such as Abyssinian Oil and Omega Fatty acids really complements my tanned skin-tone.
I noticed that the honey bisque concealer that was used during my make-under was not included in the package kindly sent and will no doubt be making a purchase at my place of work this week please god in order to truly complete the look.
The only product I didn’t open and apply to my skin that was kindly sent to me by the Bare Minerals team was the Bare Minerals Blush in shade Laughter as upon close inspection of the ingredients, realised it contains ‘carmine’ an ingredient I have chosen to avoid since transitioning to natural products so will probably end up giving it away.
For those not aware carmine is a pigment of a bright red colour obtained from the aluminium salt of carminic acid which is produced by scaling insects. This is my personal preference though: you may be different and not mind this ingredient within your cosmetics.
If you have reached this part of the article without wanting to fall asleep I commend you as I agree it is a fairly lengthy article but when having share my thoughts and experiences on both my make under and recreating the look at home you can appreciate there is no way to condense the information without missing vital pieces of important information out.
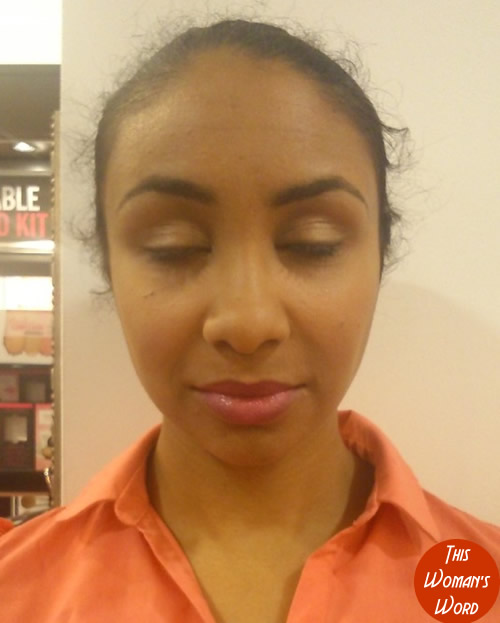
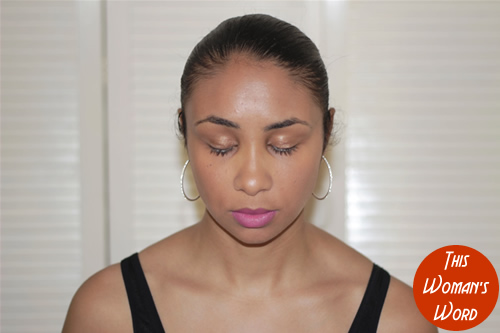
Below is the look I recreated at home upon my first attempt using Bare Minerals without the help of a qualified MUA and, despite the number of products actually used, I found the process quite fast and very easy to complete.
For the purpose of this review and to truly test how the products would react with my skin when wearing them on a daily basis, I set myself the gruelling task of wearing this look to work every day last week.
Now I say gruelling as I’m not a regular make-up wearer and knew I would strongly despise getting up earlier than I usually do at 5.15 am just to apply make-up. Kudos to the many women that do this routine daily as I simply love my bed faaar too much to wake up much earlier than my alarm all in the name of a daily beauty regime and beautifying myself.
With my only real gripe at getting up earlier to ensure my face is not rushed, I am pleased to confirm that the Bare Minerals Original SPF 15 stayed on waaay pasted the recommended eight hours wear time. I generally finish applying the make up at or just after 5.30 am and set off to work shortly after returning home anytime between 3.45 pm and 4 pm.
Maybe the foundation stayed on longer than usual because of my decision to doubled up on moisturiser and primer as I knew I was going to be wearing it for 8 hours plus.
Working at an airport as an Assistant Facilities Manger five days a week often involves long walks around the terminal, going into plant-rooms, walking across the apron where the aircrafts are and sometimes being fully kitted up wearing a head to toe asbestos suit should we be going in an areas that is deemed contaminated so there are plenty of different harsh elements my face and skin are exposed to on a daily basis.
Not forgetting the gorgeous and hot dry weather the UK, in particular London was fortunate to receive last week but despite it all, including the sweaty and unbearable humid public bus journey’s to and from work, much to my amazement this foundation survived!
Me personally, I have LOVED this awesome discovery of wearing a foundation that looks like my skin, is weightless, provides a flawless finish whilst protecting my skin from the everyday elements due to the ingredients used. To know that the foundation and concealer is made with SPF 15 is an added bonus for it protects my skin from the sun-rays during hotter climates.
Not once did the minerals crack, streak or look ashy during the 8+ hours worn over five consecutive days and can wholeheartedly say these babies are here to stay. Being a liquid foundation girl who, would of thought I would consider choosing mineral make-up in the form of Bare Minerals as one of my first choices to use. Less really is more!
I hope you’ve enjoying reading my in depth accounts of my Bare Minerals Make Under and how easy it was in attempting to recreate the flawless bare skinned look at home.
For those living in the UK Bare Minerals UK can be found online by visiting the Bare Minerals UK website, Bare Minerals UK Facebook or by simply following them on Twitter.
For my state side readers and followers, Bare Minerals can be found online by visiting the Bare Minerals website, Bare Minerals Facebook or by simply following them on Twitter.
Photo Credit:
Non Logo Images: Bare Minerals
Logo Images: Moi – This Woman’s Word
Disclosure: This is not a sponsored post and no money has been exchanged. The products were sent to me free of charge for the sole purpose of a review. All views and opinions expressed are honest and entirely my own.
Google+Related Posts

About The Author
admin
Danielle is the proud Mother to Little Eco and Baby Fleur who is extremely passionate about all things green living, organic beauty, health and fitness. She is a qualified 1st Dan Kickboxing coach / Assistant Instructor under the PKA Kickboxing Association and also works as a freelance writer / digital journalist.